How to Embed Video in Presentations – Complete Guide
This guide will show you how to embed video or YouTube in the most popular presentation software like PowerPoint, Google Slides, Apple Keynote and Prezi. It will cover different versions of PowerPoint as well.
Dag Hendrik Lerdal
This guide will show you how to embed video or YouTube in the most popular presentation software like PowerPoint, Google Slides, Apple Keynote and Prezi. It will cover different versions of PowerPoint as well.
Videos are a great way to enhance presentations, either as transitions, product demonstrations, icebreakers, speaker introductions or running in the background.
Even though the presentation software supports video it doesn’t mean that the video is guaranteed to play. As a presenter, you want to make sure the video plays and is displayed as planned without any errors or interruption. This guide will help those that want to use videos in their presentations and avoid the typical pitfalls and mistakes that can easily make an otherwise professional presentation look bad.
Guide Content
- Short introduction to audio and video codecs (you can skip this)
- How to insert or embed video in Office 365, PowerPoint Online, PowerPoint 2013 and 2016, PowerPoint 2010 and PowerPoint 2007, Prezi, Google Slides, Apple Keynote
- How professionals use videos in their presentations
- Tips to how you can use video in your presentation
- Video presentation software and resources to get started
Why can it be hard to use and embed video in presentation software?
Videos use audio and video codecs to compress (makes the file size smaller) and still keep most of the original quality while playing. Maybe you remember the old .WAV audio files? It would normally take at least 30mb for a 3-minute song. With today’s codecs, this is about the same size as a 3-minute long 720p YouTube video — with sound!
There is currently a lot of audio and video codecs out there so when working make sure you stick with the most common video formats (e.g., MP4 and WMV) as a general rule.
One of the most popular video players, VLC, was more or less developed so that you don’t have to worry about audio and video codecs when playing videos, since it’s bundled with great support for many video formats. This is one of the reasons why SlideDog uses VLC for video playback.
When it comes to embedding or inserting online videos from YouTube or Vimeo, in addition to audio and video codecs, you will need to stay connected to internet while presenting, which might impose its own issues.
How to insert or embed video in PowerPoint?
PowerPoint lets you embed or insert videos into presentations. You can insert or link videos from your PC or from services like YouTube, Vimeo or other online sources.
Sometimes there are major differences between the different versions of PowerPoint so be aware. Find the guide that fits your version of PowerPoint below.
Tip: If PowerPoint is your go-to presentation software we highly recommend you to always try to upgrade to the latest version. As you can see below, videos is way easier to work with the newer versions of PowerPoint.
Tip 2: Microsoft has created an overview of supported video and audio formats in PowerPoint.
Tip 3: Compress your PowerPoint files. From PowerPoint 2010 you have the option to compress your videos which makes your PowerPoint file size smaller (but can sometimes decrease the quality of the video, so be aware). For more information check the guide to compressing files in PowerPoint.
Office 365, PowerPoint 2019, PowerPoint Online
In Office 365 and PowerPoint 2019 it’s recommended to use MP4 video (H.264 video (a.k.a. MPEG-4 AVC) and AAC audio). Supports playback of YouTube, Vimeo, and Microsoft Stream videos by using the insert online video feature in PowerPoint.
In PowerPoint Online you can only use online videos. This means it’s not possible to play a video from your computer unless you e.g. upload it to Youtube first. As a general rule, if the video plays in your browser it will play in PowerPoint Online as well. If you need to play a Windows Media (.WMV) or a Flash video (.FLV) you need to install Microsoft Silverlight or Adobe Flash. Also keep in mind that you are limited to 50mb-100mb size limits.
PowerPoint 2013 and 2016
Same as earlier versions but better support for MP4, but you might still receive errors or have problems if e.g. your MP4 video has a different audio codec.
Supports YouTube videos through a link or by using embedded code. YouTube playback requires that Internet Explorer 11 is installed on your computer.
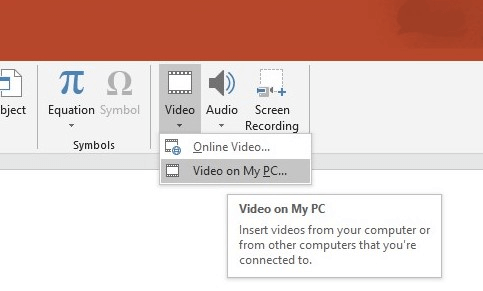
Insert a video by clicking “Video on My PC”. You will find the option on the Insert tab and by clicking the arrow under Video.

If you would like the video to start automatically and play in full screen. Select the Start and Play Full Screen options as in the screenshot above.
PowerPoint 2010
You will have to use proprietary Microsoft video formats (Microsoft recommend that you use .WMV files) or MP4. In case you use MP4 you will need Apple Quicktime installed. YouTube support has been discontinued so you can’t present videos from YouTube anymore.
To insert a video click “Movie from File”. You will find the option on the Insert tab, in the Media Group and by clicking the arrow under Movie.
PowerPoint on Mac
As a general rule, you should use MP4 videos when using PowerPoint on Mac, especially if you are going to present using Mac as well.
Supports playback of YouTube, Vimeo, and Microsoft Stream videos by using the insert online video feature in PowerPoint.
PowerPoint 2007
You will need to use proprietary Microsoft codecs such as WMV. To insert a video click “Movie from File”. You will find the option on the Insert tab, in the Media Clips and by clicking the arrow under Movie.
PowerPoint 2007 only supports linking to videos. See the topic below on how you can avoid broken links!
How to handle broken links and manage file-size
Up to PowerPoint 2016 when you embedded videos you only store a link to the video, so if the file moved or changed filename you will have a broken link and the video won’t play. The recommendation is to store the video in the same folder as the presentation. In PowerPoint 2016 you can embed the actual video file to prevent broken link issues but take note that for large videos the resulting PowerPoint file-size will also increase. To prevent large PowerPoint files you would need to convert before embedding it.
How to insert or embed video in Apple Keynote
In Keynote its generally recommended to use MP4 videos but if you can play the video using the Quicktime player it will most likely work in Keynote as well.
To embed or insert a video in your presentation, drag and drop the file into the slide were you want to present the video.
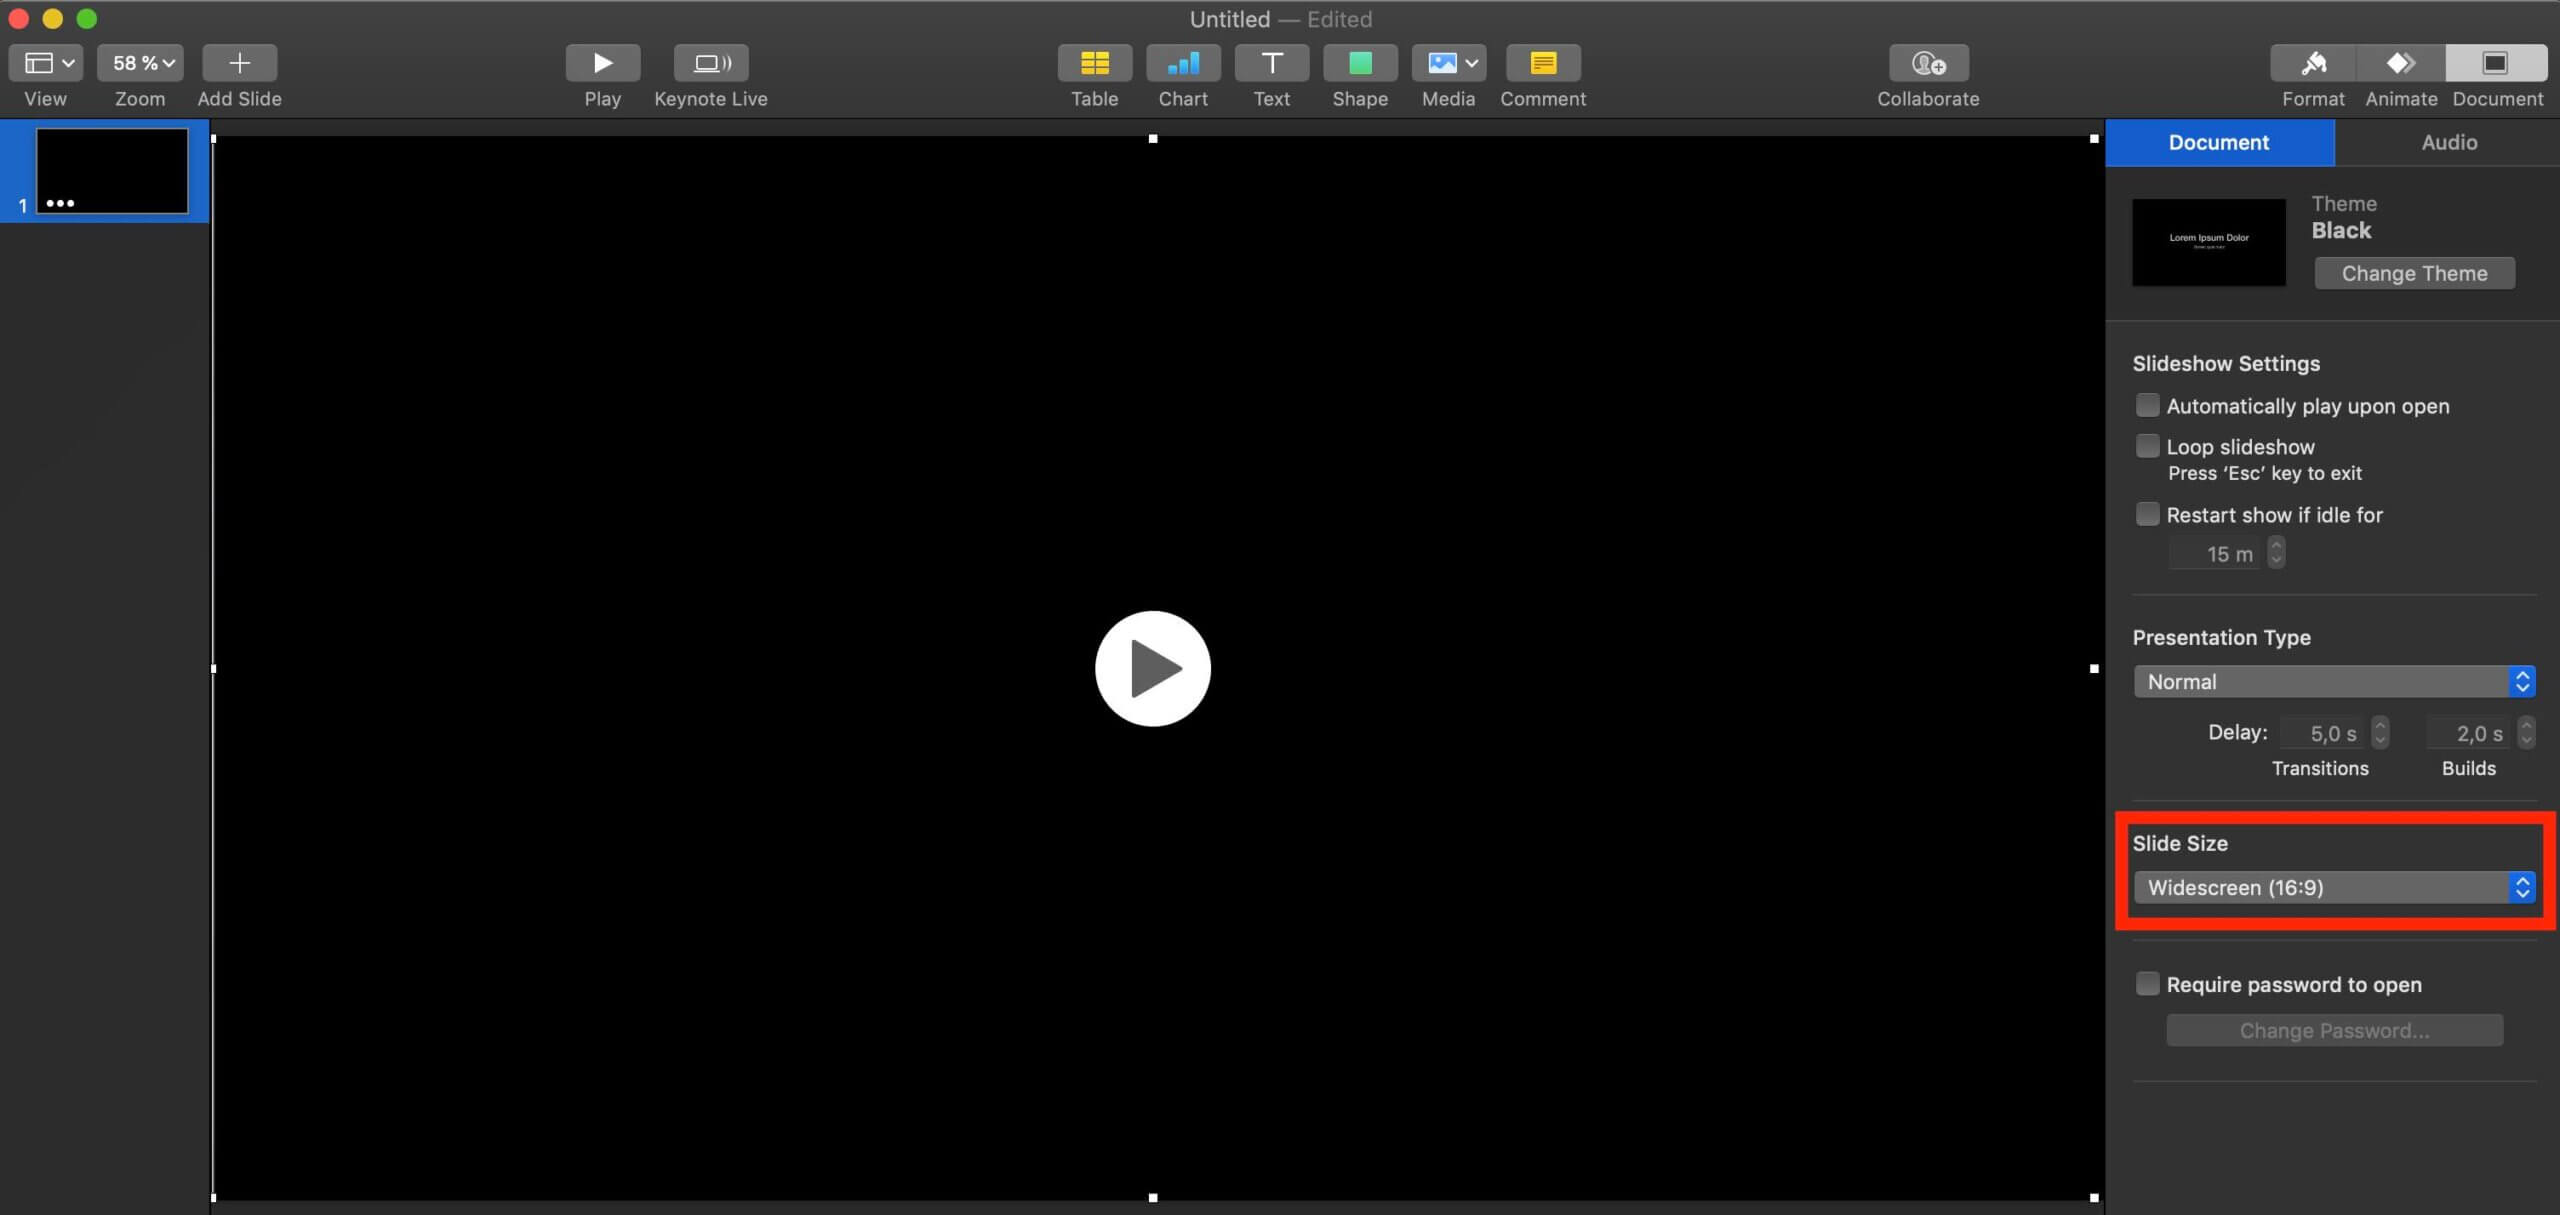
Depending on the aspect ratio of the movie, your presentation and the projector or screen in which you are presenting you might need to do some adjustments. You can change the “Slide Size” under the Document tab to change the aspect ratio to fit the video. For example if the video is in 16:9 and your presentation is in 4:3 (default) you can change “Slide Size” to 16:9 and follow the instruction below to make it fullscreen.
For fullscreen, after you have added the video, drag it by one of its corners so that it covers the whole slide.
How to insert or embed video in Prezi
Prezi supports adding MP4 with audio in AAC Codec (HE-AAC codecs are not supported) and YouTube videos by using the insert video feature. Please note that this is a paid feature. Prezi also recommends that the video size is below 50mb.
To insert a video in Prezi click the Insert button at the top of the screen and then select Video. You can now either upload a MP4 video or embed a YouTube video (by its link).
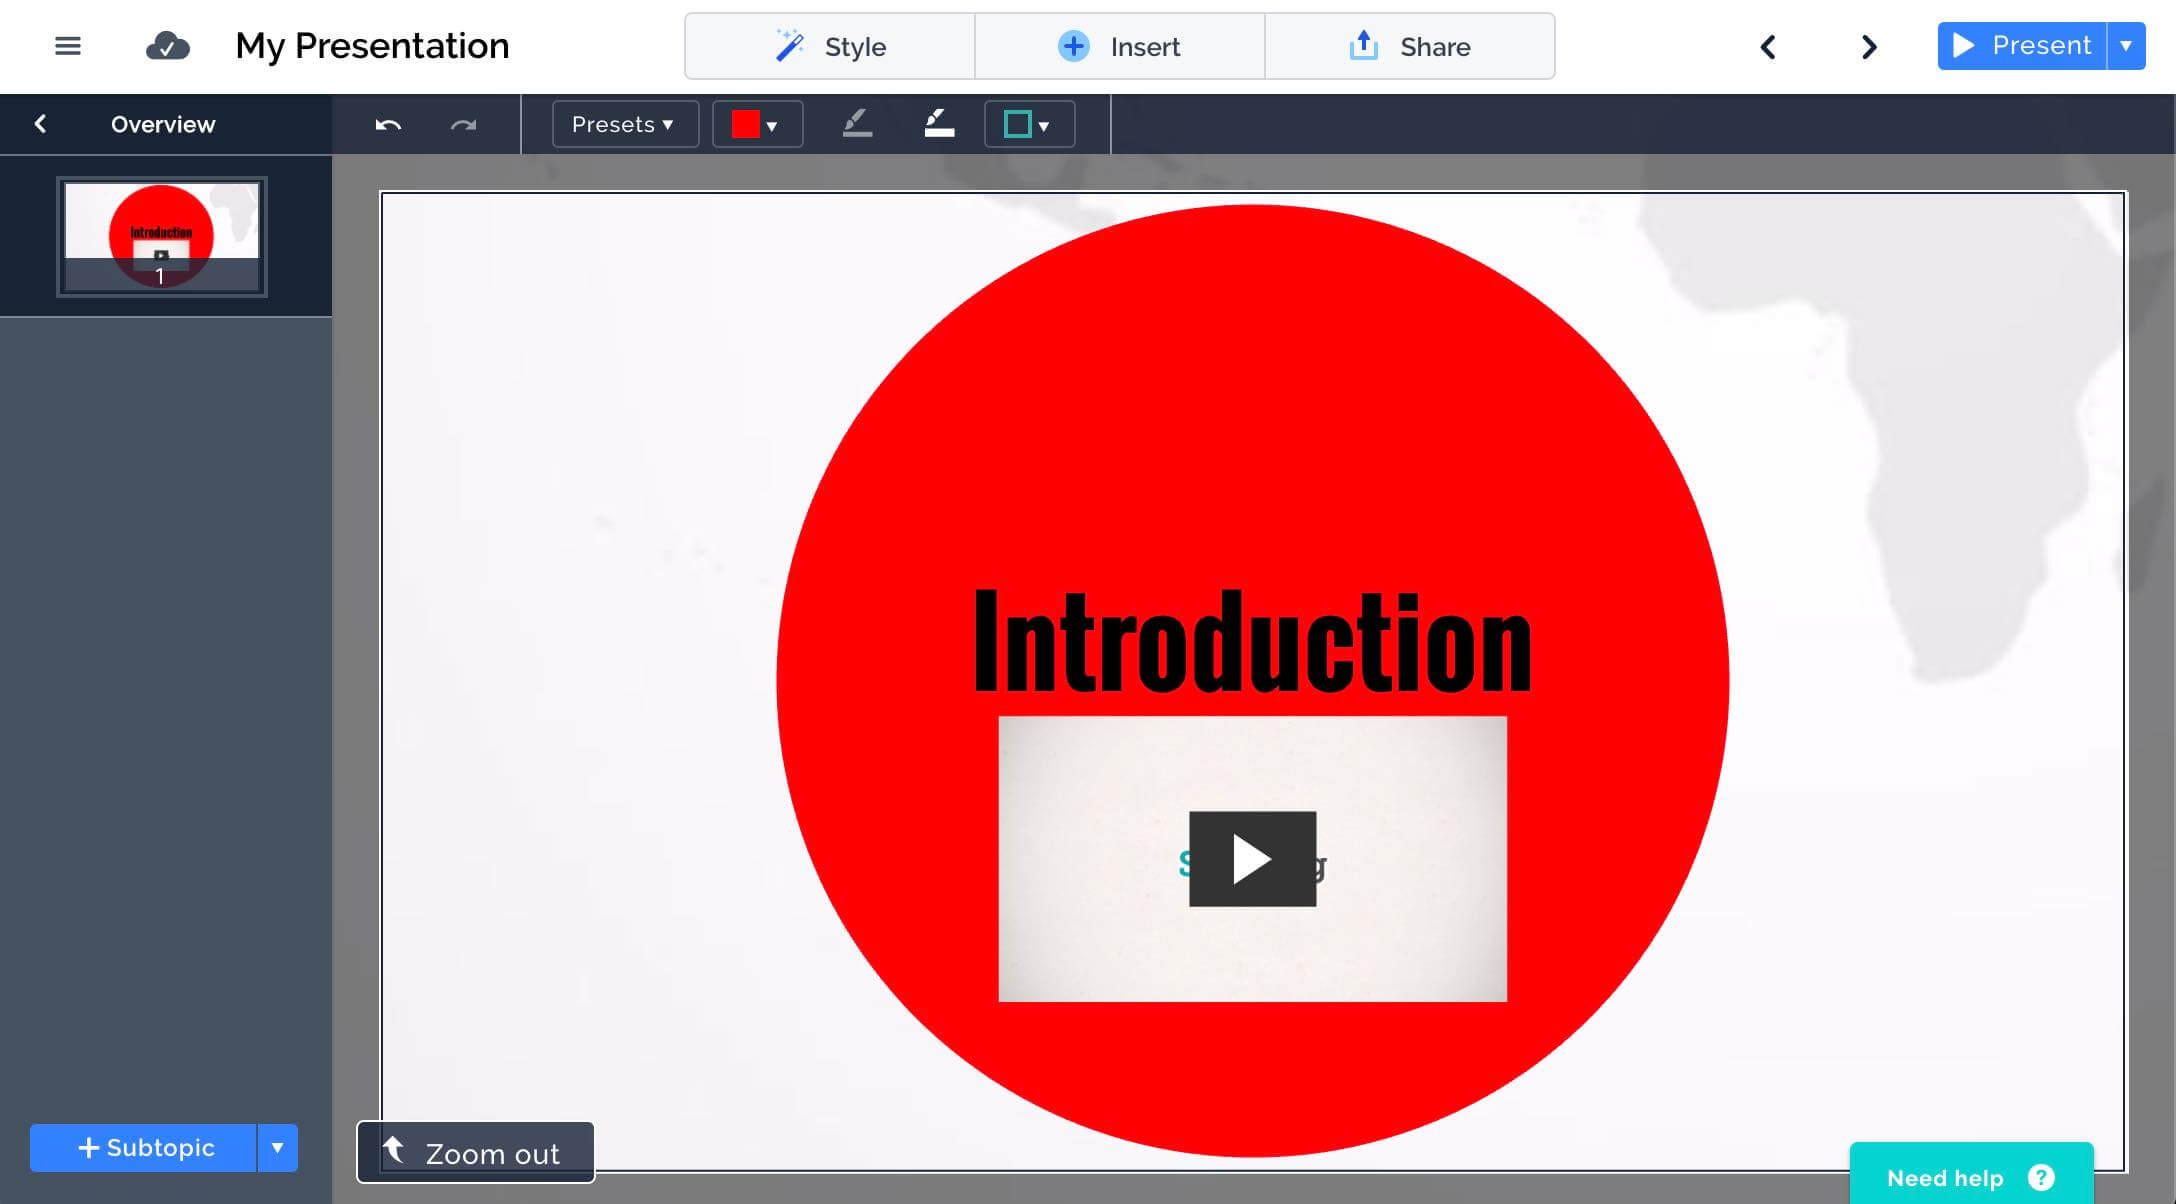
After the video is added you can resize it to better fit the presentation. Please note that it will be added as a path so the there will be a thumbnail (from the video) with a play button and when you click that button it will transition to fullscreen and play the video.
How to insert or embed video in Google Slides
Google Slides supports inserting MP4 videos from Google Drive and YouTube links.
Before you can insert a video from your PC to your Google Slides presentation you will need to upload it to Google Drive first. After you have uploaded the video it needs to be processed (can take some time) and you also need to make sure correct permissions are set.
In Google Slides, click Insert and select Video. Your video should now appear under “My Drive”. Select the video and click the Select button to insert the video.
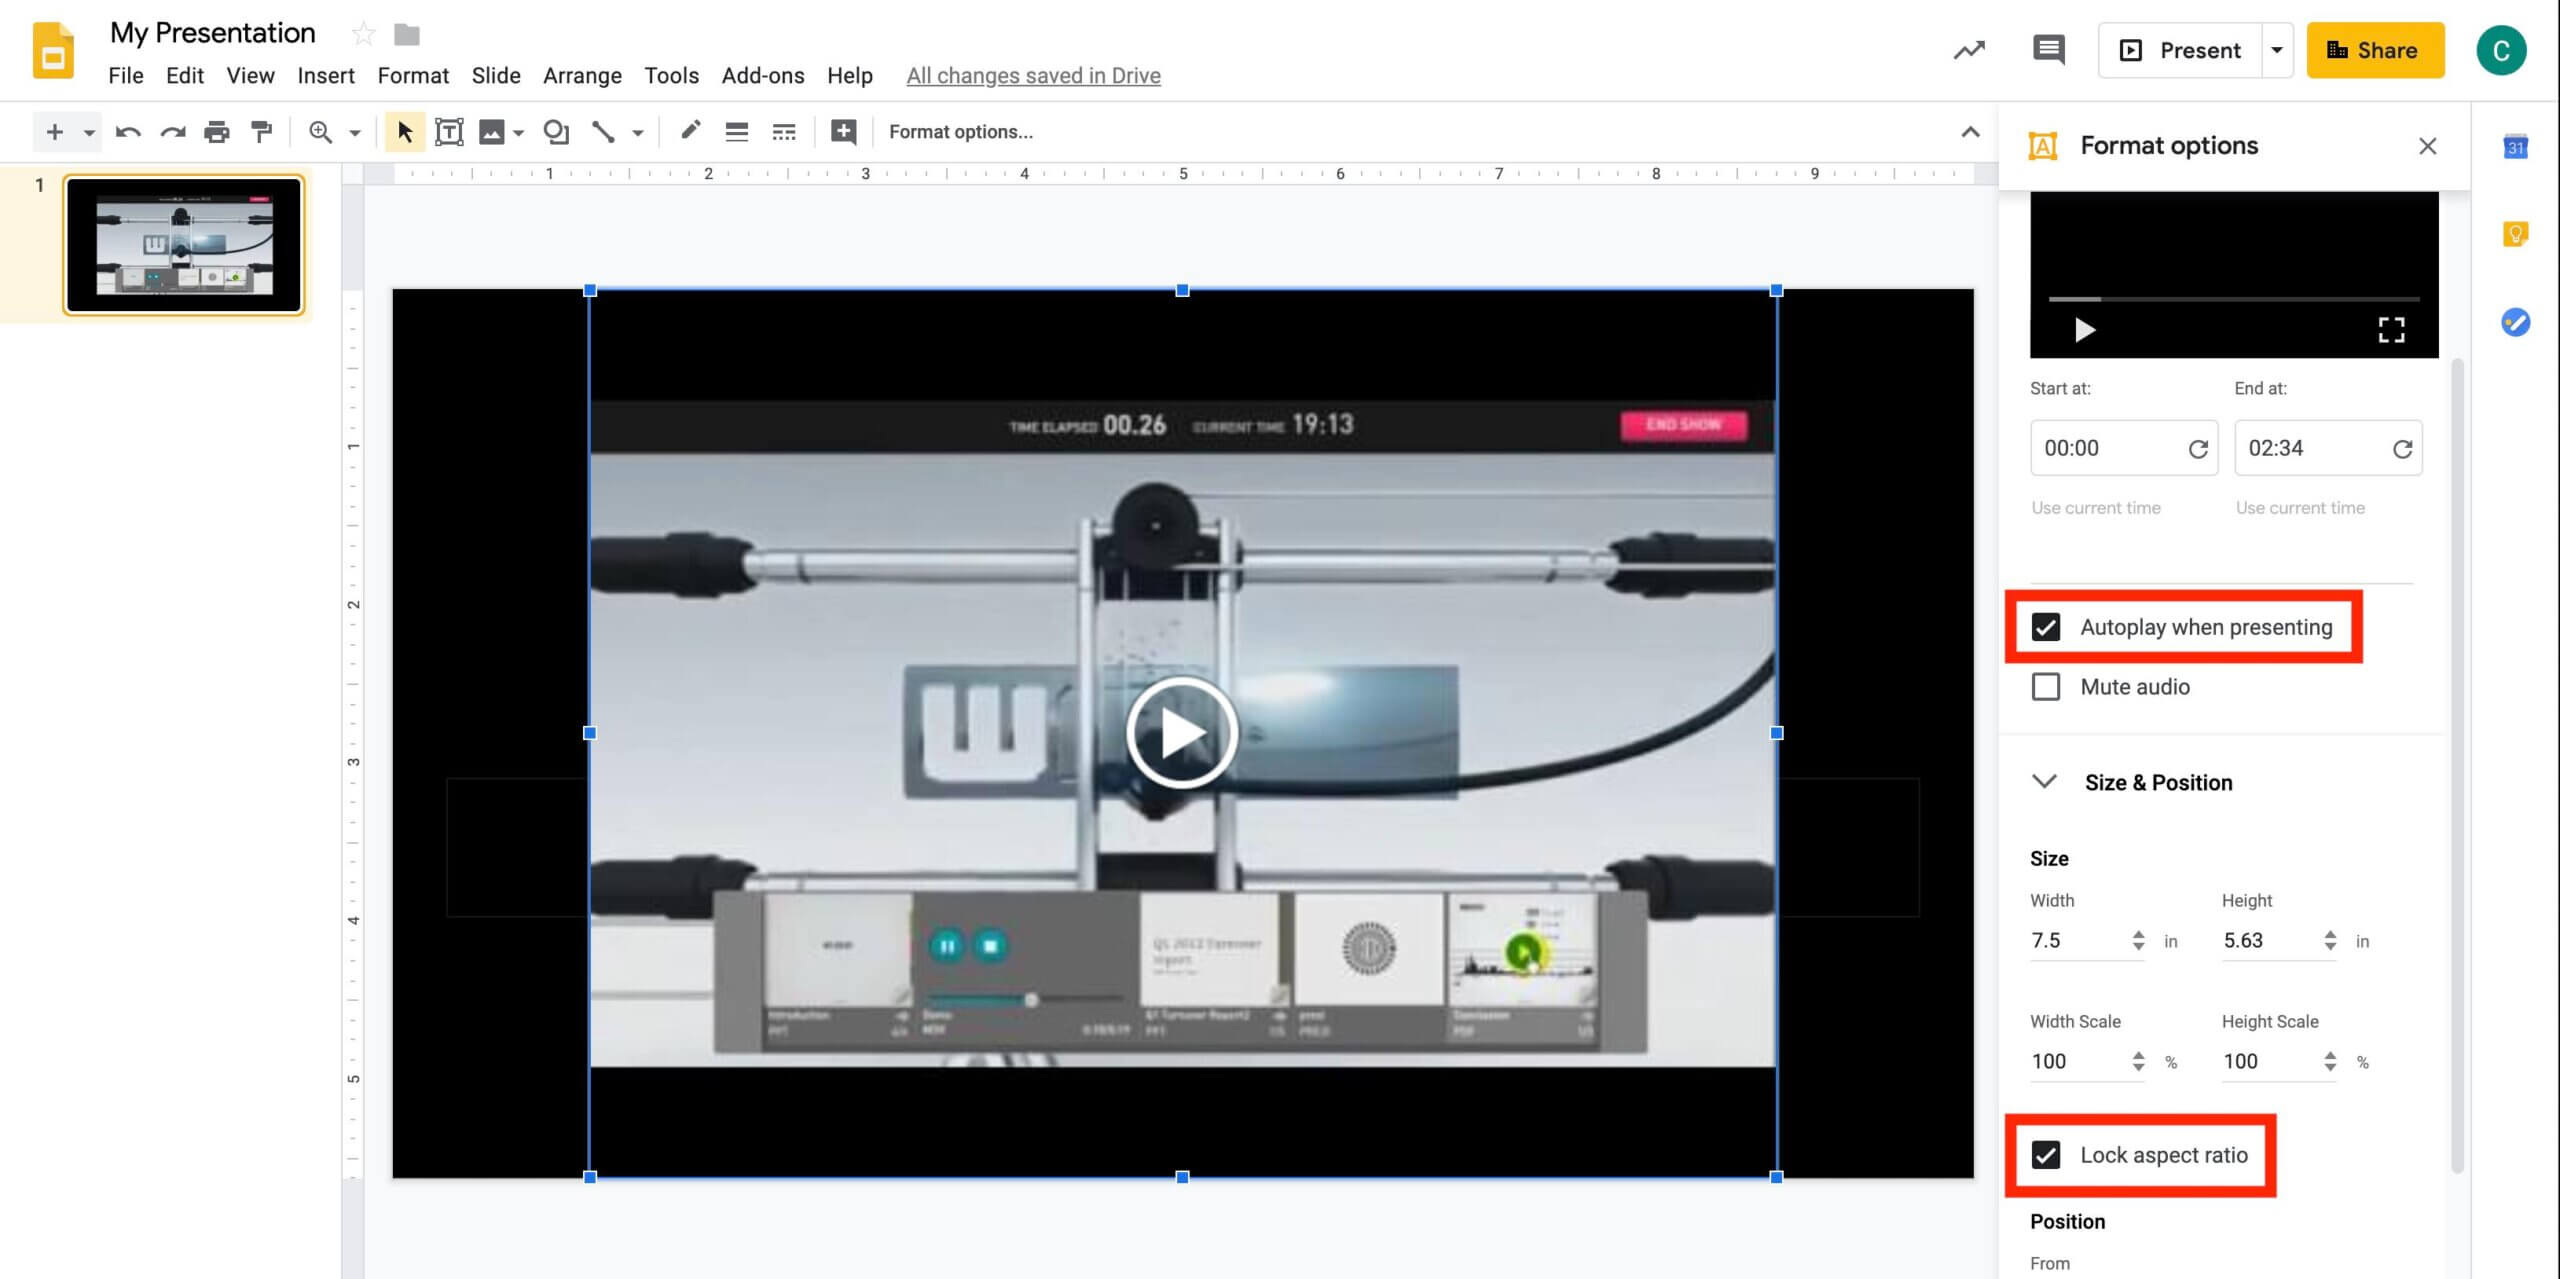
Under Format Options make sure “Autoplay when presenting” and “Lock aspect ratio” is selected. Drag the video to fit with the size of the slide to present the video in fullscreen.
If the aspect ratio doesn’t match with the video you can change the aspect ratio of the presentation by going to File and Page Setup and select e.g. widescreen (16:9) or Standard (4:3).
How to handle aspect ratio when embedding videos in presentation software
In PowerPoint, if you play the video using fullscreen you need to make sure that the video fit’s with the aspect ratio with the projector. If you don’t use fullscreen videos, you need to make sure the aspect ratio of the video fits the presentation otherwise the video will be distorted during playback. Up to PowerPoint 2010, the default aspect ratio was 4:3 from PowerPoint 2013 the default is 16:9. Also, if you are changing the size of the video make sure to resize it so that it keeps its original aspect ratio.
The rules are more or less the same for Google Slides, Prezi and Apple Keynote as well.
How professionals manage videos in their presentation setup
There is no single solution which fits all presenters but depending on your context (keynote presentation, conference or business meeting) there are some common setups which we can learn from.
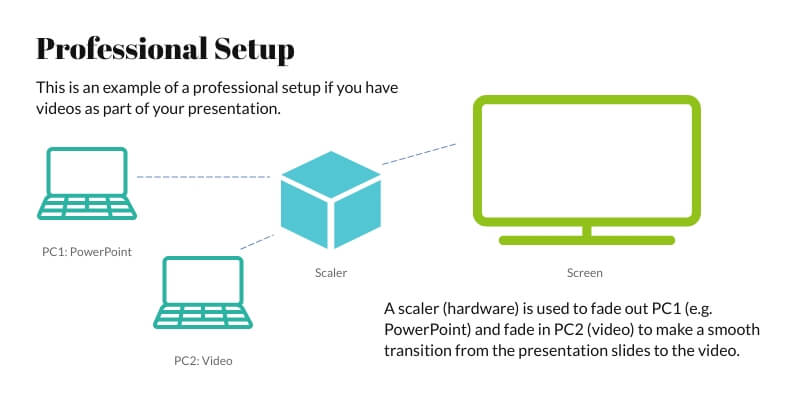
One of these setups is by using 2 or more computers connected to a scaler which is connected to the projector. PC1 is running e.g. the PowerPoint presentation while the other computer (PC2) is running the video. When you are ready to transition from the slides to the video you use the scaler to fade out PC1 and then fade in PC2. The advantage of this setup is that the video is preloaded and ready to run and very unlikely to fail. If something unexpected happens you can switch between the sources. The disadvantage is that this requires several computers, extra hardware and probably a person to manage the transition.
Another option is to use broadcasting software (typically used for streaming and broadcasting) which allows you to set up scenes and transitions and doesn’t necessarily require extra hardware but can be quite complex to manage, setup and use.
The third option is to use presentation software like SlideDog. SlideDog lets you emulate the first set up by seamlessly switching between a PowerPoint and a video even though they are running on the same computer.
Tips to how you can use video in your presentation
A professional setup can require expensive hardware and additional personnel so with these tips we are focusing on how you can accomplish this as easy and cheap as possible.
1. Avoid online videos in keynotes, product launches, and important presentations
In these scenarios, the video is very likely to be a central piece of the presentation and you can’t risk the outcome of the presentation based on how reliable the internet connection is.
If you need to present a video which is online, obtain the rights to use the video and get access to and download the video file.
2. Don’t manually switch between slides and video
Let’s say you have PowerPoint running and it’s time to show the video. Don’t minimise PowerPoint and click run the video from a desktop icon. This workflow disrupts the attention of the audience and makes you look unprofessional as well. Continue reading to see how SlideDog can be a solution to prevent this completely.
3. Avoid lengthy videos unless really necessary
Keeping your videos below 1-2 minutes in length will mostly keep your audience engaged throughout the video. This is the length of videos which most users are used to through e.g. social media. This does of course not apply to e.g. background videos.
4. Avoid overuse and remember to integrate videos well
Plan your usage of videos well throughout your presentation. One example: If you plan to start with a video, have either a blank slide (or simple picture/logo) as the first slide and then skip to the video when you are ready. This will hopefully prevent you from starting the video too early and you can time the start perfectly.
This also applies for the slides following a video, plan the transition well.
6. Sound in presentation videos is important
Sound is what separates your video from just an animation. Think about the intro in your favourite tv series — how would you feel if they left out the theme music?
If you don’t need sound or fullscreen video playback then maybe a GIF would be sufficient? PowerPoint has supported GIFs since PowerPoint 2010 and you are less likely to run into compatibility issues.
7. Use SlideDog as a video presentation software
As we mentioned in the introduction, VLC is a popular media player since it’s packed with audio and video codecs which makes it able to play most video formats that exist.
SlideDog comes bundled with VLC and uses it for video playback. This means as a presenter you can simply drag and drop a video-file to the playlist and SlideDog will be able to play most video formats that exist.
Not only that, VLC is really convenient when it comes to aspect ratio and scaling so videos are optimally displayed at fullscreen.
Lets say you plan to present an introduction, the main content and two videos during this presentation.
Remember the tip above? Let the first playlist item be a “resting slide” in our case our company logo. Then create a separate PowerPoint presentation files for the introduction and main content (this might also help you mentally separate those parts of the presentation for better dynamics and flow).
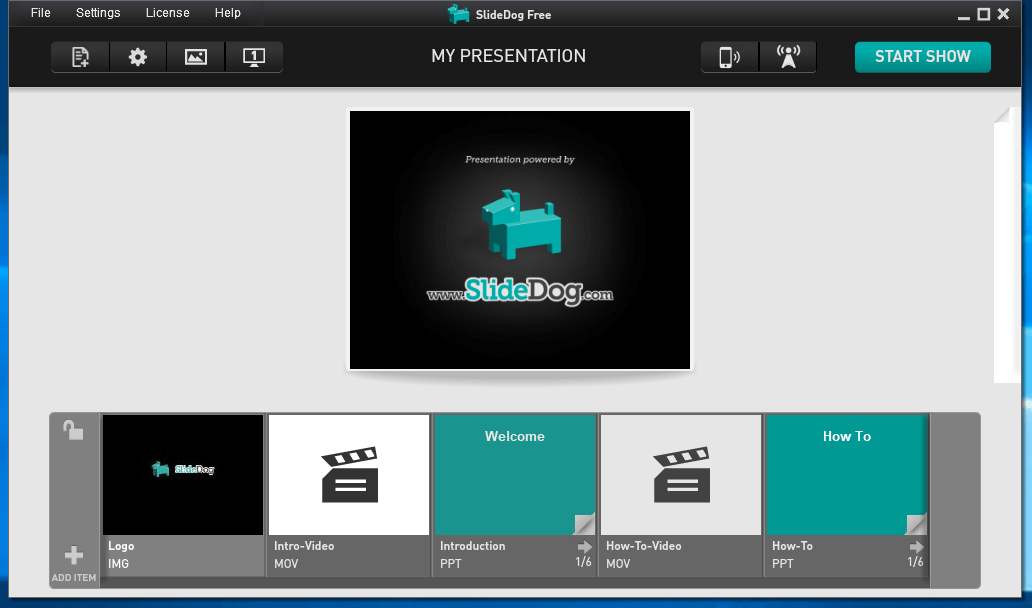
Now we drag the introduction video into its slot and then we drag the second video after the first section of slides. Our presentation is now ready!
In addition to using VLC to play the videos, SlideDog will also preload the videos so that they are immediately ready to play when you advance through the presentation. Please note that including many (especially large) videos in your playlist require a computer with sufficient memory to preload the videos. With the SlideDog Remote App, you can also play, pause and skip the video as well.
Videos work with SlideDog Free so you can test this out right now for free.
Video presentation software and resources to get started
Nothing beats original content, so if you have videos or animation specially made for your company, presentation or similar that’s probably the best start.
Another option is to use stock videos as part of your presentation. You can choose between royalty free videos (may require attribution) or buy the right to use videos commercially.
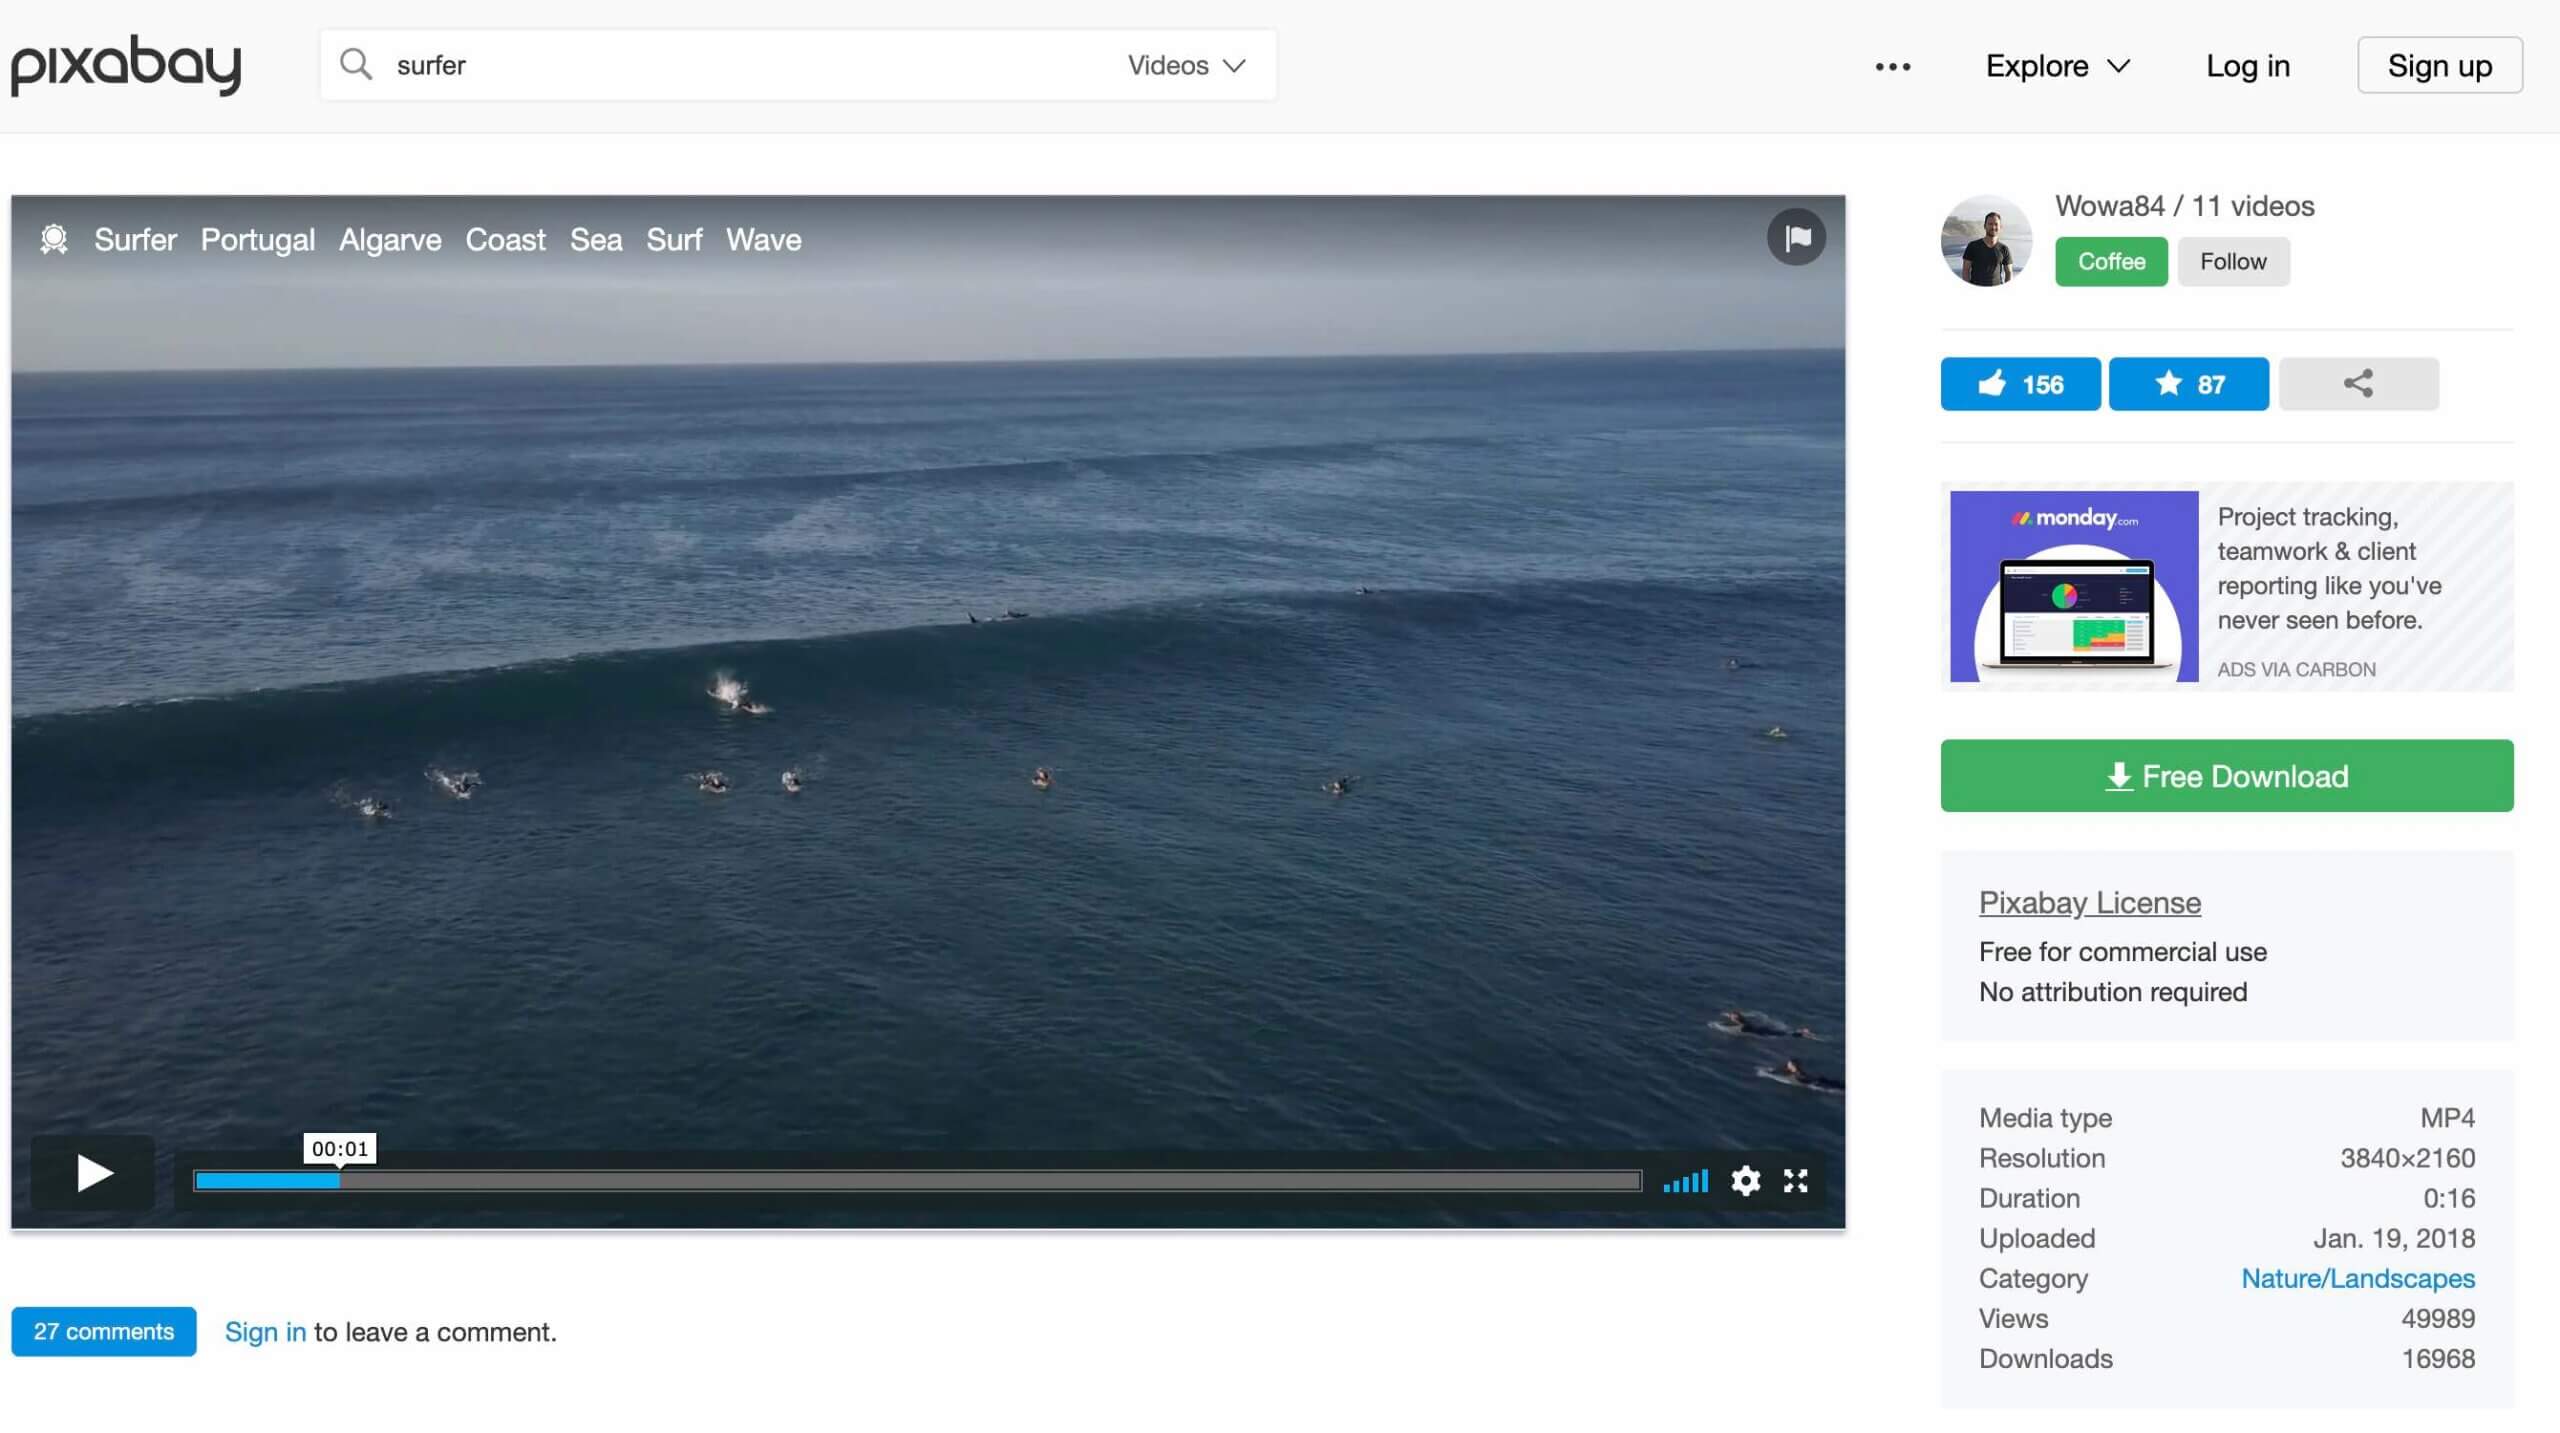
Pixabay is a service which offer thousands of free stock videos you can use in your presentations.
Other sites which may be worth checking out is Videezy and archive.org.
Another option is to use video presentation software. You have desktop application like iMovie for Apple but there are many online video presentation software alternatives. Many of these offer template based editing. This means you can just edit the text in the template and then download a fully personalised video without any video editing.
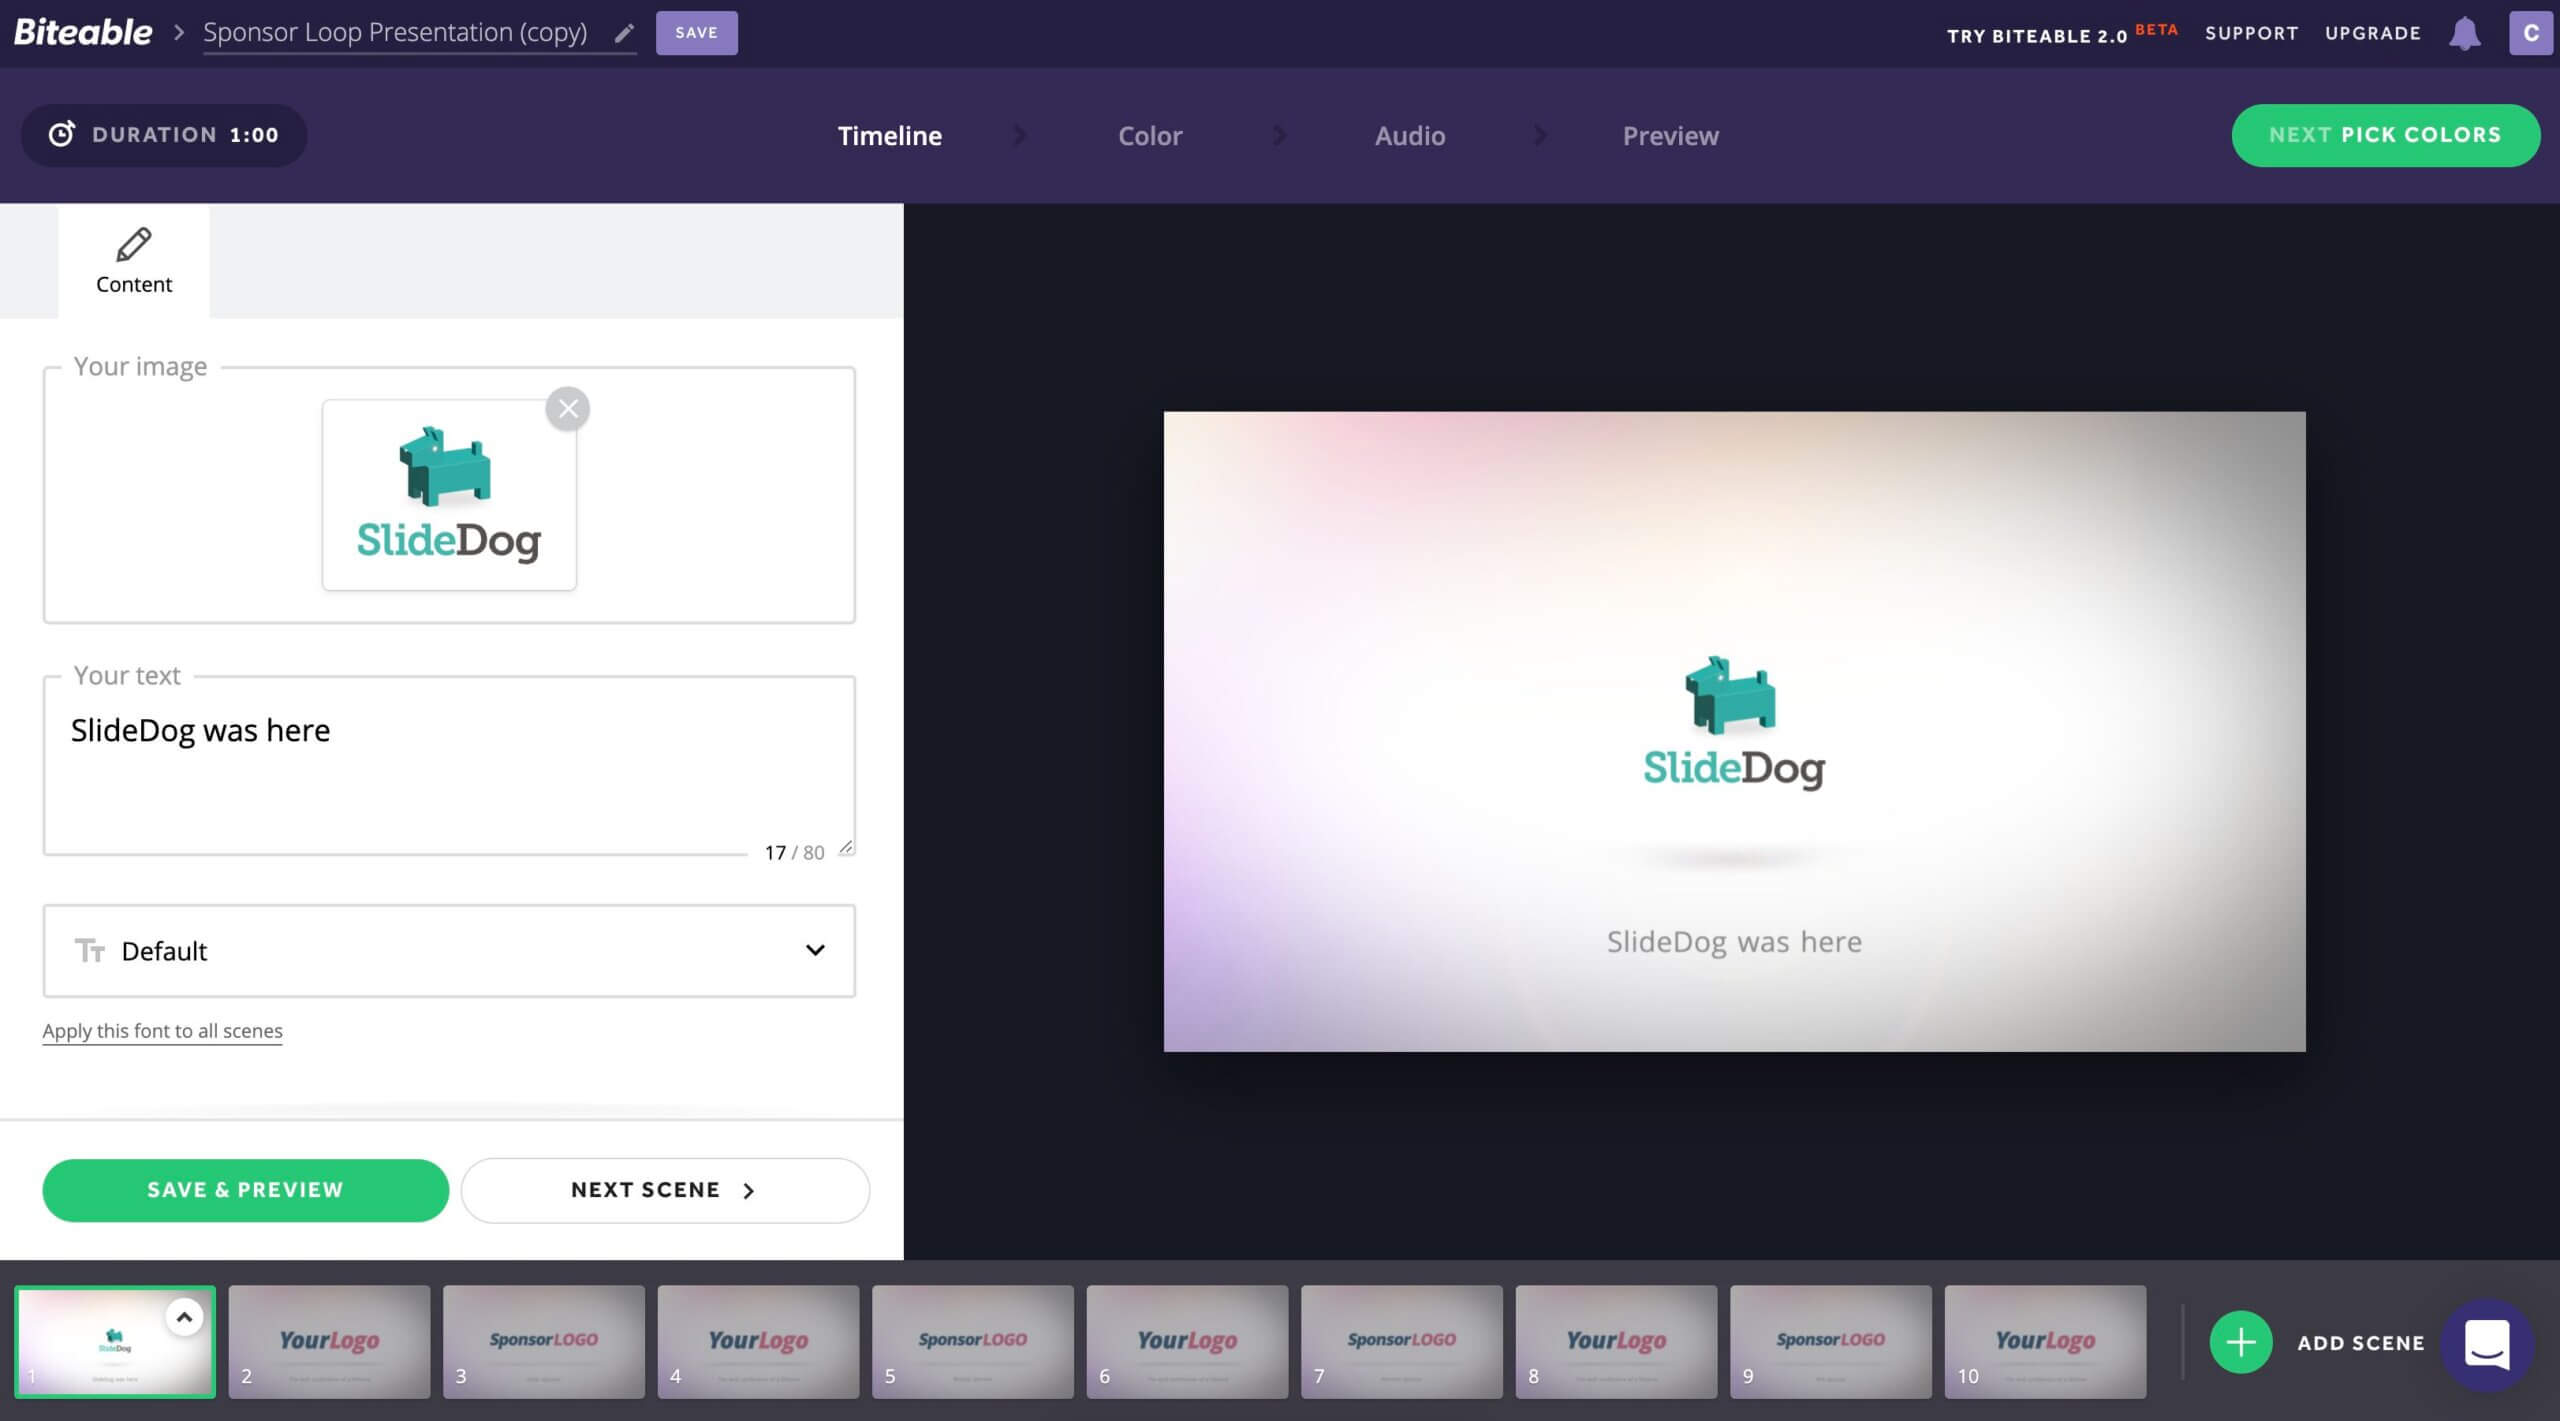
An example is Biteable which lets you choose from a range of templates and change the text and images to suit your use-case. After the video is generated you can download it and use it in your presentation. Please note that you need to have a paid subscription to be able to download and remove watermarks on videos.
In this guide we have covered how embed video in the most used presentation software together with an introduction to audio and video codecs.
We hope that by the end of this guide your understanding of using videos in presentations has improved so that you can integrate videos without running into the typical issues.
Do you have any experience with using videos in your presentation? Maybe some tips which isn’t covered here or maybe a fun story where you ran into video playback issues? Please share your comments below.